
Learn to Code in 10 Minutes. With Cats.
Hey there, Albert here again! When I tell people that I teach young students coding, they always respond with “OMG! Can you help me learn how to code!? I’ve always wanted to learn but it seems impossible!” I’ve had enough with the fear. This post will get you coding your own awesome games with Scratch in about 10 minutes. Don’t believe me? Ask the 80 middle schoolers we’ve worked with.
A Little Bit About “Coding”
Knowing how to code is simply knowing how to think logically. It comes naturally to most people. So why isn’t everyone pumping out billion-dollar tech companies out of their parent’s garage? Because there are tons of different coding languages with their own rules and syntax. Thinking logically is easy, but remembering every little space, semi-colon, and weird procedure name at the same time is daunting.
With a strong understanding of basic concepts, you can do great things in any language. That’s why I recommend Scratch to every beginner: it’s one of the few coding platforms that eliminates the language barrier. Coding blocks are separated into pieces that snap together easily so you can just focus on the concepts and worry about the syntax later.
I will walk you through your first game design project with the help of some friendly GIFs. I hope you’ll try it on your own screen first, but if you’re ever lost, just take a peek at the pictures below for guidance.
With all of that said, let’s dive into our first lesson using Scratch!
Make an Account! (Or Don’t)
First thing’s first: go to the Scratch website and make an account! It’s a pretty quick and painless process, and allows you to work on projects from any computer. We made one, and so should you!
If you don’t make an account, it’s OK. You can still follow along with this lesson. You just won’t be able to save your work… which means you to won’t be able to continue working on your awesome project once you close your browser 🙁
Create a New Project
Let’s start our first project by clicking “Create” in the menu bar. This should open up a brand new project, where you’ll see the Scratch Cat to your left, some colored blocks in the center, and some open space on the right.
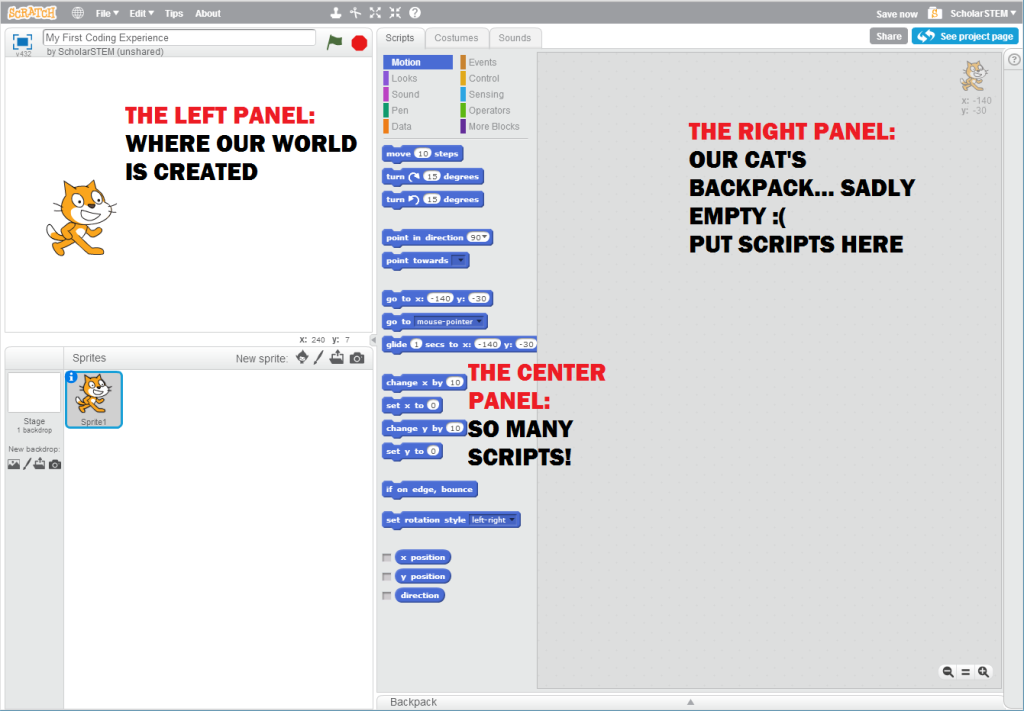
The left panel is an interactive world. Any new characters (aka sprites) you create or backgrounds you design will appear there, and you’ll be able to see your game in action after every step.
The center panel contains all possible commands that you can give your sprites/backgrounds. They are separated into color-coded categories and are literally the building blocks for making anything with Scratch.
The right panel is your sprite’s “Script backpack.” Did you notice that the Cat is selected/highlighted in the lower left window? This means you are currently looking at the Cat’s backpack. The Cat will remember any and all scripts you give it. You can add scripts by dragging pieces from the center panel to that open space on the right.
Scratch is Moving
SO LET’S MAKE OUR CAT MOVE!
Our first Script, how exciting! Our goal here is to program our Cat-buddy to move whenever we use the arrow keys.
Let’s break it down into simple steps:
1. Click on the “Events” script tab (it’s the brown one)
- All of the scripts here are usually event-based… shocker. An event is usually something that a human does and the computer listens for (e.g. pressing a key or clicking the mouse).
2. Drag the “when space key pressed” block over to the right panel
- This script block is the holy grail of keyboard-programming in Scratch. Instead of“space”, you can change it to any key on the keyboard!
3. Change the “space” to “up arrow” by using the drop-down list on the script itself
- We’ll be doing this three more times when we create scripts for the right, left, and down arrow keys.
4. Click on the “Motion” script tab (it’s the dark blue one)
- These scripts usually have to do with moving your sprites – and you were nervous about coding…
5. Drag the “point in direction 90” block over to the right panel, and attach it to the “when up arrow key pressed” block.
- Snapping scripts together may take a bit of getting used to, but once you get it down, you’ll find that it’s very satisfying.
- The reason we attach this direction piece is because our sprite needs to have a direction before it moves. The Cat always remembers where he is facing, so it’s important that we set a different direction for every arrow key!

6. Change the “90” to “0”
- When you click on the drop-down list, you’ll see four numbers: 90, -90, 0, 180. Luckily Scratch tells you which number corresponds to which direction, so you don’t have to remember! We are selecting “0” (up) because we are programming the up arrow key – makes sense, right?

7. Drag the “move 10 steps” block over to the right panel and attach it to the bottom of the “point in direction” script
- The final step – ACTUALLY MOVING. Our Cat is already pointing up, so all that’s left is the physical movement.

Go ahead and test out that up arrow key! Your Cat should be walking upwards like a pro.
With your sprite moving up flawlessly, all you have to do is program the other three arrow keys! Unfortunately you’ll have to repeat the steps we just took, just with different values… or you could just right click and use duplicate:
Remember! You’ve got to make sure each direction correctly corresponds to the arrow key you are programming for. For example, the right arrow key’s “point in direction” should be “90.”
One last note: you can change how your sprite rotates. So if you’re like me, and prefer your Cat to be right-side up at all times, you can set the rotation-style to “left-right.”
So what did we learn today? How to control a Cat with arrow keys? Yup. But that’s not all. If you’ve made it this far, you’ve started learning object-oriented programming, and gotten your first experience with event handling. These concepts carry over to desktop, web, and mobile software development.
Next time, we’ll create a background for Mr. Cat to explore! Before you know it, you’ll be making awesome games and learning more core computer science concepts without even realizing it :).
Till next time!

No comments